Please enable JavaScript to view this site.
Overview
Often when sending documents via email customers would like to have the Email body as HTML and also include data from the spooled file such as Order Number, Invoice Number etc. If you are putting the spooled file through the Advanced Reformatting Utility (or a pre-process SCS PPD), then there is a very simple way of producing this message body.
•Step 2 - Add the HTLM to your Cobwebb Design
•Step 3 - Add the HTML File to your Final Cobwebb Design
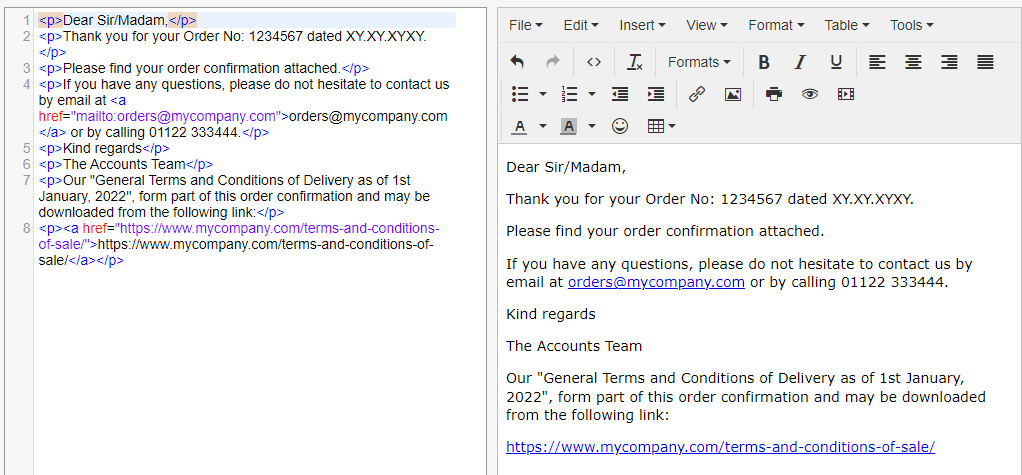
There are various HTML Editors out there but we have found this one to be the simplest to use https://html5-editor.net/. Note: This creates basic HTML but without adding fonts.
Here you type what you want in the right hand pane, including formatting, hyperlinks etc. and the HTML is generated in the left hand pane.
Step 2 - Add the HTML to your Cobwebb Design
Normally the PPD calling the Advanced Reformatting Utility (ADVRFMT) doesn't actually use the Output Pane in the Cobwebb Designer. This means that it can be used to design your HTML.
Configure the PPD Page Setup
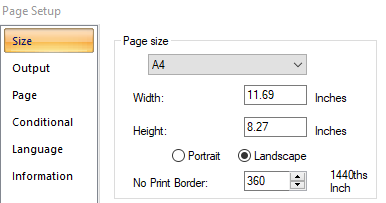
In order to be able to fit more of the HTML across the page we would suggest that you change the File > Page Setup to Landscape.
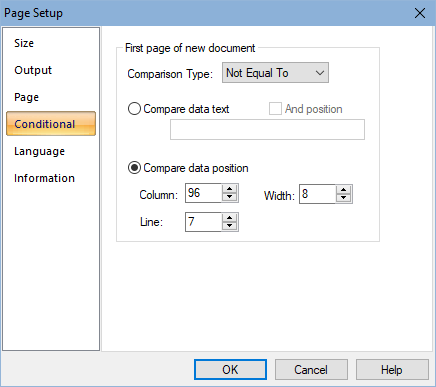
You should also configure the Conditional tab to set the Compare data position for defining the first page of a new document. Note: This would normally have been done anyway to split up the Advanced Reformat output.
Here we are using the position of the Order Number on the spooled file.
Add HTML as Static Text
This would normally be added under a Page=*FIRST Condition as you would need to create a different HTML file for each Email output. In this example we are splitting the spooled file by Order Number so the message body will be different for each order.
The HTML is added to the Output Pane using the Static Text element but you need to take care that you are not adding too much of the HTML to a Static Text i.e. you can see everything on the Output Pane. It is easy to split the text and add a new Static Text element to include the remaining text.
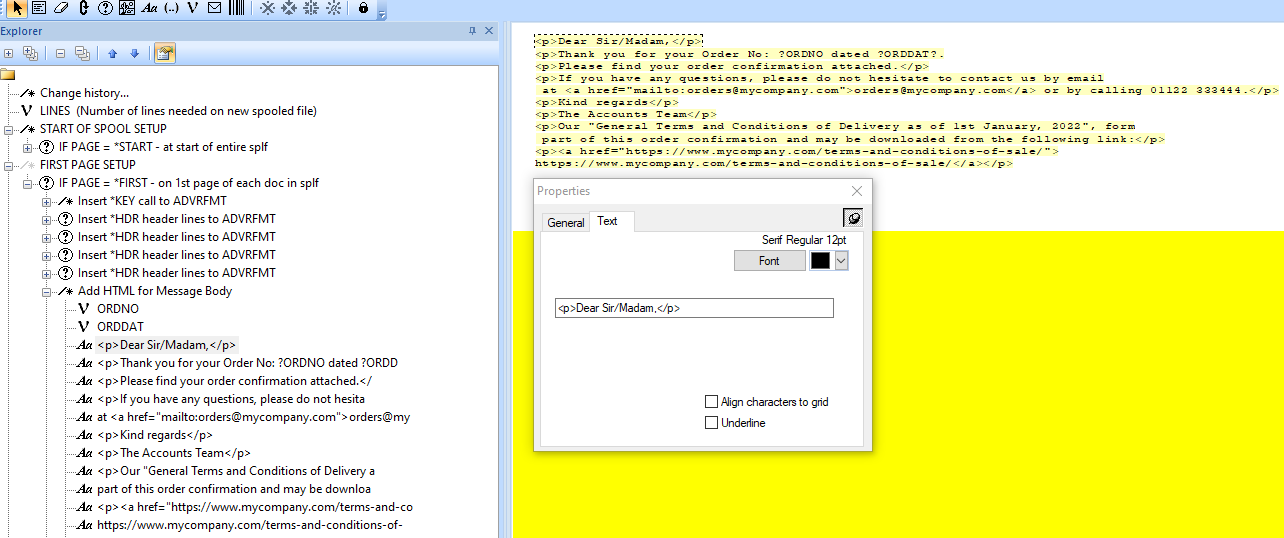
Multiple Variable Substitution can be used to concatenate HTML and data such as Order Number, Order Date etc. from the spooled file. To do this you would first create a Variable for each piece of data you wish to include e.g. ORDNO & ORDDAT in our screen shot.
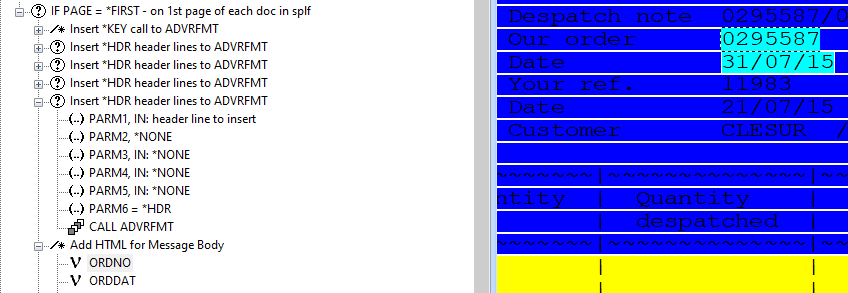
Then use the Static Text element to output the Variable to the page i.e. ?ORDNO e.g.

Note: If there needs to be a character rather than a space after the Variable, as in the case of ORDDAT which has a full stop, then you need to add an extra ? at the end of the variable name e.g. ?ORDDAT?.
Write the File Name to the Output pane
Unfortunately you cannot use the Multiple Variable Substitution when defining Address elements in an Output Device so the Order Number (which is going to be the File Name) needs to be written to the Output Pane. This will be removed later when creating the File Output Device so just add it somewhere after your HTML.

Add a *HDRX Call to ADVRFMT for path to HTML
It is a good idea to add the path to the HTML file onto the spooled file generated by the Advanced Reformatting Utility as then, if you need to change the path, you only need to do this in one PPD and not both. This path will then be used in the final PPD as the path to the HTML for the Message Body in the Email Output Device.
This information can be output to the Spooled File generated by the Advanced Reformatting Utility using a *HDRX call to ADVRFMT e.g.
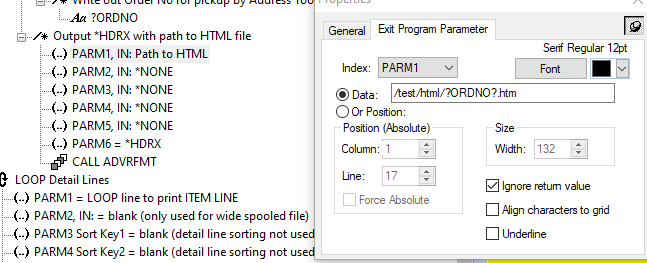
Note: You could use other types of ADVRFMT call such as *DET or *TRL but we have used *HDRX. Also the extension needs to be .htm as only 3 characters possible in a File Output Device.
You then add a File Output Device and give the file a unique name such as the Order Number so that it doesn’t get overwritten by anything else.
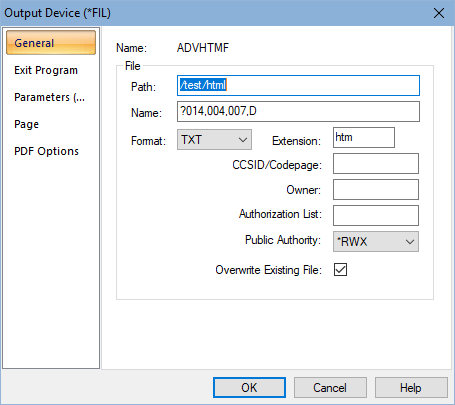
Here we are using the Order Number output to the Output Pane for both the First Page and File Name parameters. The Extension should be HTM as only 3 characters are allowed for this.
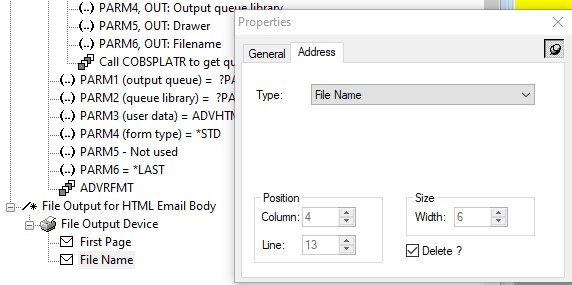
Note: As shown above, make sure that you have the First Page element before the File Name and then tick the Delete box for the File Name parameter otherwise this will be output to the HTML.
Example HTML Output
Source created by PPD

File displayed in Browser

Step 3 - Add the HTML File to your Final Cobwebb Design
Next, in the PPD that processes the output from the Advanced Reformatting Utility, you can specify the path to the HTML file in the Email Output Device.

Here we have added the output from the *HDRX call to ADVRFMT to the top of the Output Pane, where we won’t be outputting any actual information required for the email. We have then defined this as a Message Address element and selected to Delete it from the Output pane afterwards.
The HTML files will remain in the folder where you created them and will never be deleted. If you wish to automatically tidy this folder then you could use the Folder Housekeeping function in the Cobwebb Server software but care would need to be taken not to delete files where the Email may have failed to send.
